


Vegan Fried Chicken


If you’ve been craving crispy, golden comfort food, this vegan fried chicken recipe is about to be your new favorite. It’s messy-finger, can’t-stop-eating, “wait… this is tofu?!” kind of good. The tofu soaks up flavor like a sponge, and the crunchy coating gives you that classic fried “chicken” bite. It’s salty, crispy, and seriously satisfying, especially when dipped in your favorite sauce.
This deep fried tofu recipe is also super fun to make at home, even if you don’t fry food very often—no deep fryer necessary. All you need is an inch of canola oil in a pan, and you’re ready to go!
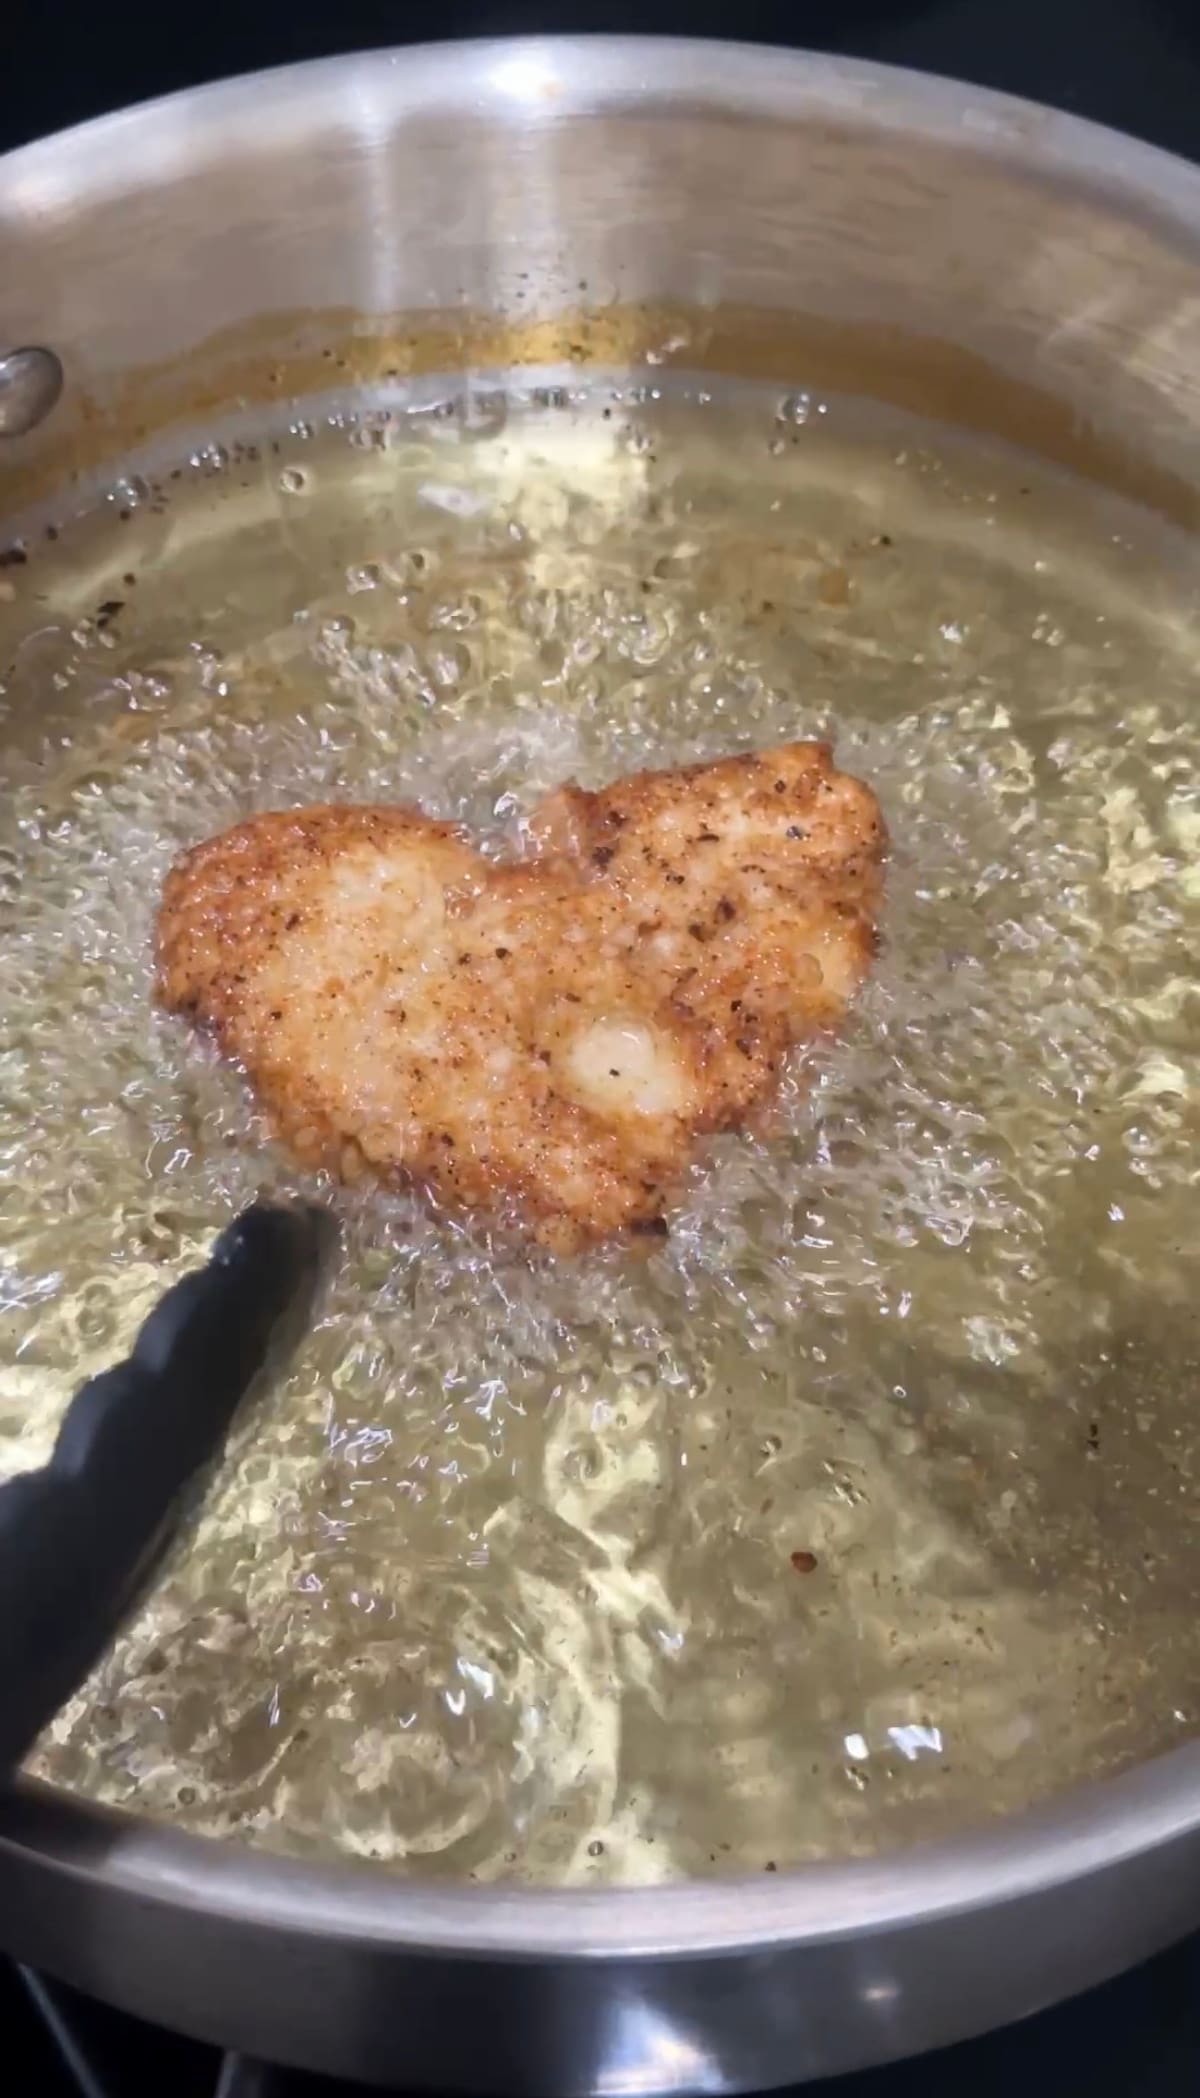
You can keep it simple with hand-torn tofu nuggets, strips, or get creative and make different shapes. An extra festive idea is using cookie cutters to cut the tofu into shapes for a holiday or party—like hearts for Valentine’s Day. Once it fries up, it still gets crispy and golden, but with an extra fun twist.
Serve it with sweet potato fries, mashed potatoes, or stuff it into a savory sandwich for the ultimate comfort meal.
It’s really disappointing that you can’t get vegan fried chicken at Popeyes, Chick-fil-A, or KFC. But, check out this vegan chicken guide for our favorite chicken-less recipes! You’ll also absolutely love this Nashville hot and spicy fried chicken!
Why This Tofu Chicken Recipe is So Awesome
This crispy fried tofu recipe is golden, crunchy, and packed with flavor in every bite. It’s super easy to make, totally plant-based, and perfect for dipping, sandwiches, or any comfort food craving!
- Crispy, Crunchy Goodness. Every bite is golden, crunchy, and satisfying. The coating gets nice and crispy while the inside stays soft and flavorful.
- Super Flavorful. With soy sauce, bouillon, and spices, each piece is packed with savory, smoky, garlicky flavor. It tastes like classic fried chicken, but meat-free!
- Fun to Make. You can cut the tofu into strips, nuggets (like these quinoa nuggets), or even cute shapes with cookie cutters!
- Perfect for Dipping. These tofu “chicken” pieces love sauces! Try barbecue, vegan ranch, creamy dill, hot sauce, or your favorite dip for extra yum.
- Great for Any Meal. Serve it as a snack, in a sandwich, with fries, or over a crisp salad. It’s flexible, filling, and perfect anytime you crave something crispy.

Key Ingredients and Substitutions
Discover the star ingredients that make deep fried tofu crusty, flavorful, and irresistible. We’ll also share easy substitutions so you can customize it to what you have on hand! Handy Tip: For the best texture, tearing it into chunks instead of slicing can make it look and feel more like chicken—plus, it fries up crispier!
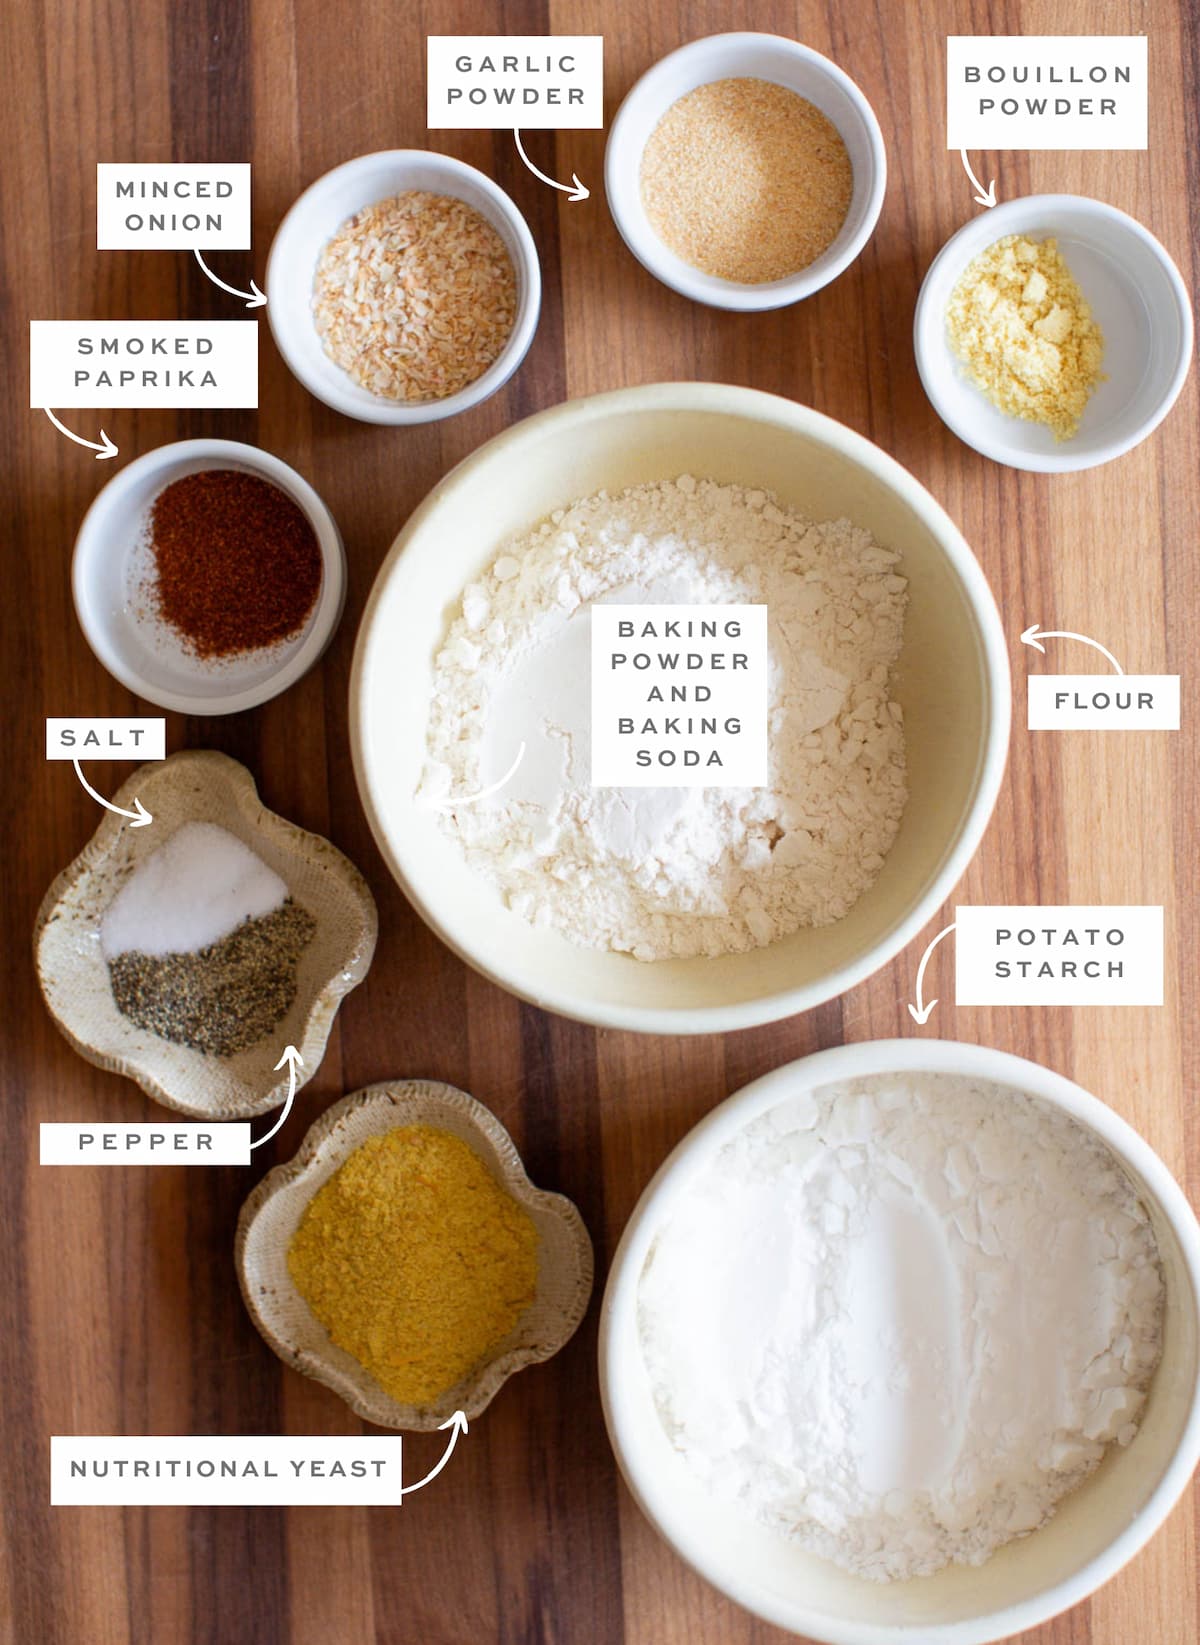
- Extra Firm Tofu – Gives you that chewy, satisfying bite that makes vegan fried chicken feel like the real thing. If you don’t have extra firm tofu, super firm tofu works even better since it doesn’t need much pressing. Tempeh or seitan can also be used for a firmer, more hearty texture.
- Soy Sauce – Adds salty, savory umami flavor that makes tofu taste much more flavorful. Let the tofu soak in soy sauce for at least 10 to 15 minutes so the flavor really sinks in. For a gluten-free swap, try tamari or coconut aminos.
- Soy Milk – Helps the coating stick to the tofu and gives the crust a richer, more classic fried texture. Unsweetened soy milk is the way to go, and adding a small splash of vinegar or lemon juice can help thicken it slightly and boost flavor. Oat milk is a great substitute because it’s creamy, while almond milk and cashew milk are also good options.
- Batter (Flour and Water) – Acts like the glue that helps the crispy coating stick to the tofu. Without it, the dry breading won’t cling as well, and you won’t get that thick, crunchy crust. All-purpose flour is the easiest option, but if you need a substitute, a gluten-free flour blend or chickpea flour both work well.
- Potato Starch – This is the star of the show! When you mix potato starch with water and use your hands to crumble it, it will form a chunky texture with little ball-like nuggets that add to the texture of your fried tofu. It helps create that craggy, ultra-crunchy crust that crackles when you bite in, while keeping the inside tender and juicy. If you don’t have potato starch, you can use cornstarch instead. Tapioca or arrowroot starch can work, but might make the coating slightly chewy and not as crispy.
- Vegetable Bouillon Powder – Adds a deep savory flavor that makes the tofu taste more like seasoned fried chicken. If you don’t have bouillon powder, use a vegetable bouillon cube, vegetable broth powder, or mushroom seasoning for an extra umami boost.
- Spices (Garlic, Onion, Smoked Paprika, Nutritional Yeast) – Give vegan fried chicken its classic bold flavor. A good tip is seasoning the flour mixture generously since tofu needs strong flavor to really shine. You can also use a little extra bouillon or a pinch of vegan parmesan-style seasoning.
How to Make Fried Tofu Chicken
Learn how to make vegan fried chicken that’s crispy, comforting, and full of flavor. Using tofu and a seasoned coating, it’s an easy, plant-based way to enjoy all the fried chicken vibes!
Step 1: Cut the Tofu – Slice the tofu into slabs, then cut each slab into thinner halves. Cut into strips, nuggets, or fun shapes (cookie cutters are perfect for this!).
Step 2: Season and Soak – Place the tofu in a flat container and drizzle soy sauce over it. Sprinkle on bouillon powder, then pour soymilk over everything and let it soak for a few minutes.

Then, Step 3: Make the Dredge – In a bowl, mix ½ cup flour and ½ cup water until smooth. This will help the coating stick to the tofu.
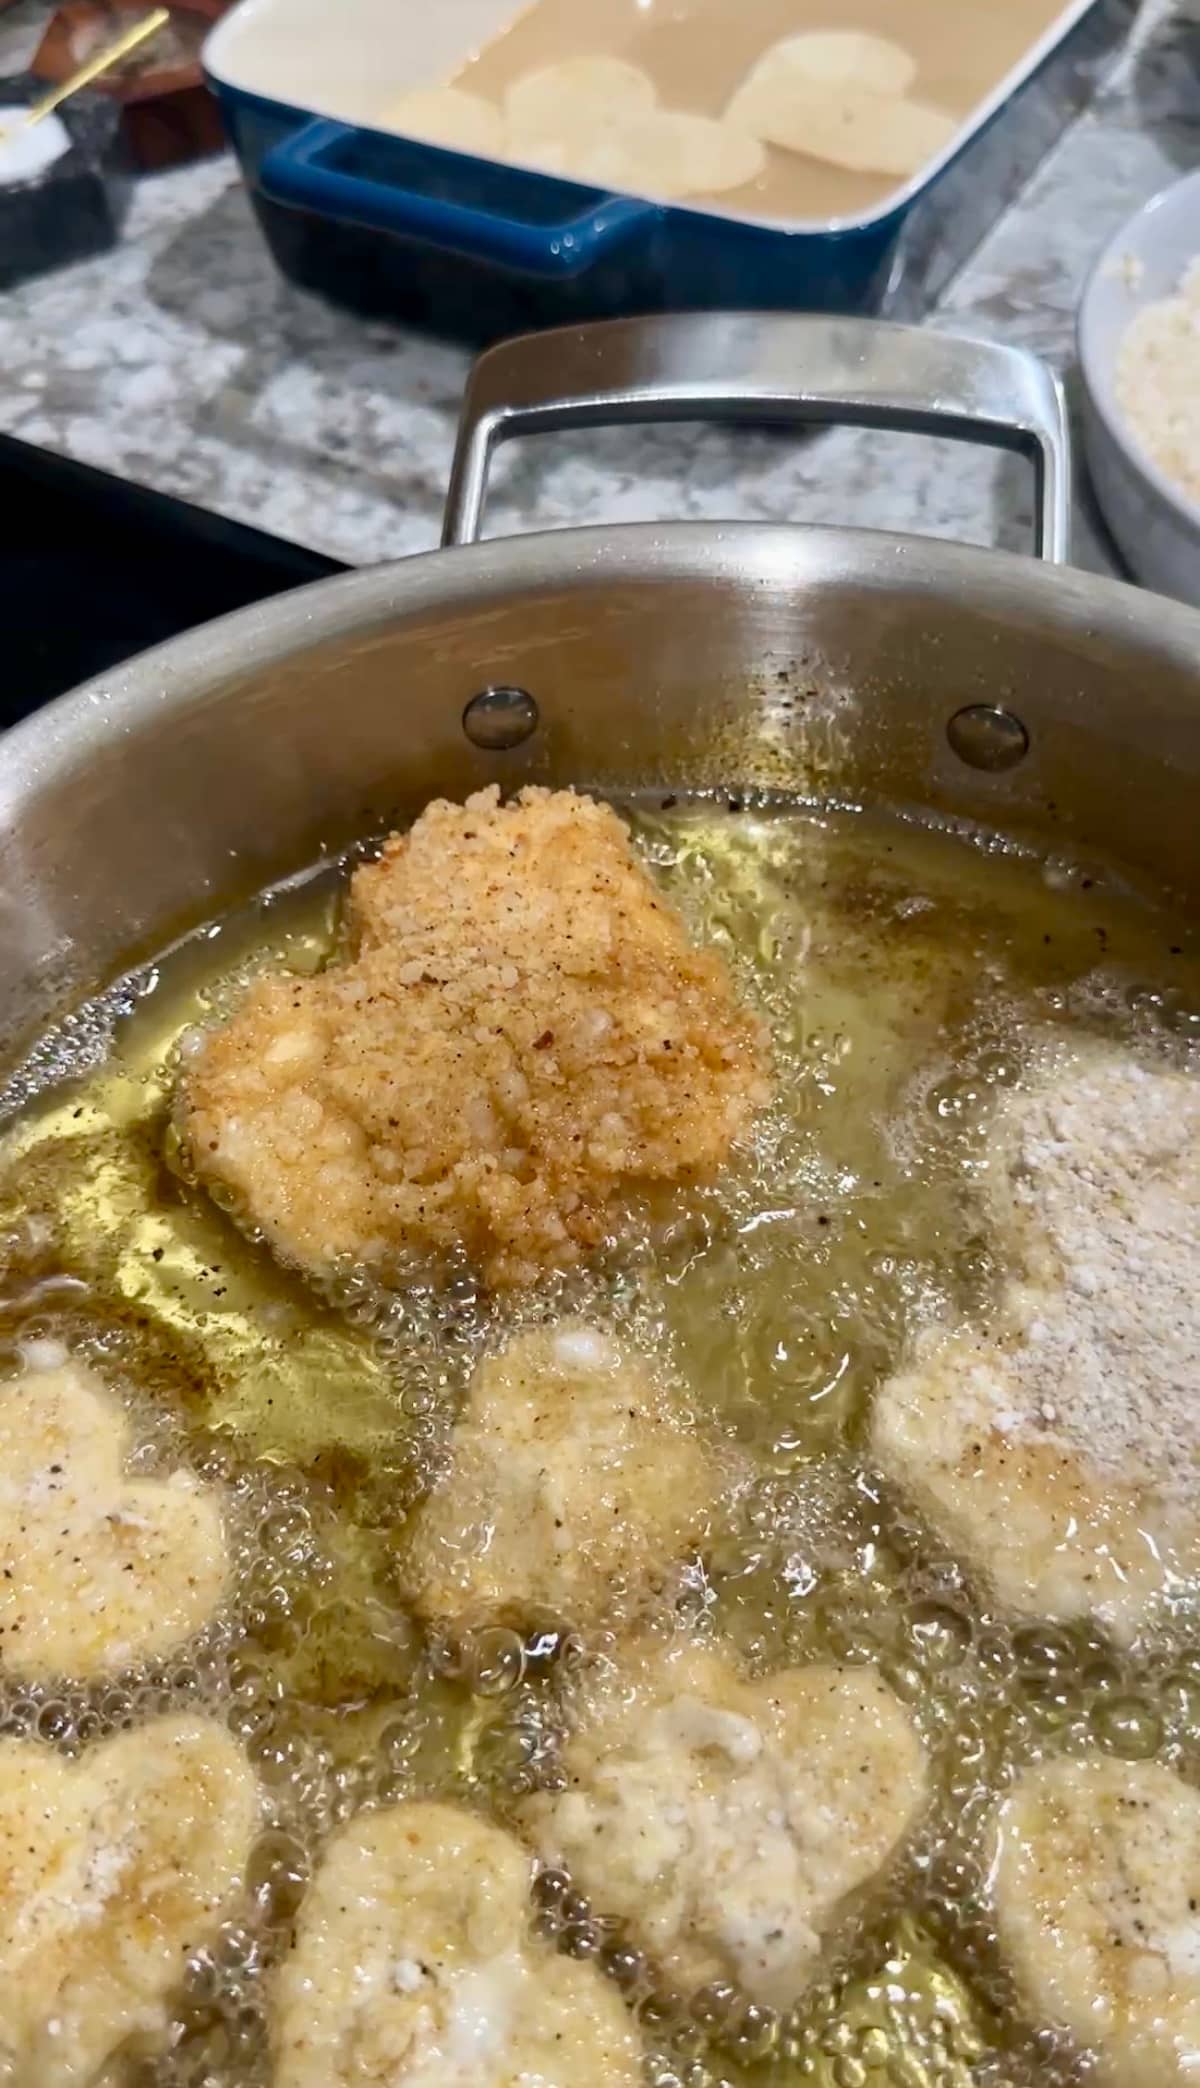
Step 5: Coat and Fry – Shake off extra liquid from the tofu, dip it into the dredge, then coat it in the dry mixture. Dip it back into the dredge and coat it again for extra crunch, then fry in about 1 inch of hot oil for 1–2 minutes per side until golden and crispy. Place on a wire rack, sprinkle with coarse sea salt, and serve hot!
Serving Tips and Suggestions
Here’s how to make your plant-based fried chicken extra tasty. Plus, we added fun serving ideas to enjoy it in sandwiches, salads, or with all your favorite dips!

- Dippin’ Heaven – Serve your crispy tofu pieces with a variety of sauces. Try vegan ranch, tangy BBQ, spicy sriracha mayo, or even honey-style agave for extra flavor.
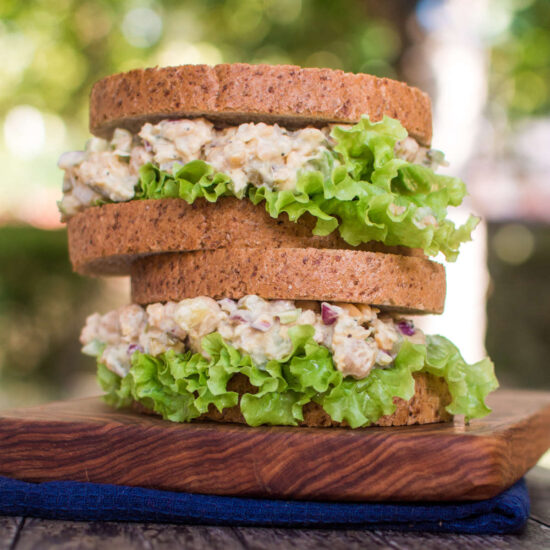
- Sandwich Style – Pile the fried tofu on a soft bun with lettuce, tomato, pickles (or pickled veggies), and your favorite vegan mayo. It makes a crunchy, satisfying sandwich that’s perfect for lunch or dinner.
- Over a Salad – Add your crispy tofu on top of a fresh green salad. It turns a light meal into a fun, protein-packed dish with tons of texture.
- Breakfast Twist – Top your tofu nuggets on a breakfast bowl with vegan gravy, roasted potatoes, or avocado. Crispy “fried chicken” for breakfast? Yes, please!
- Holiday Fun Shapes – Use cookie cutters to make tofu hearts (these heart-shaped cookie cutters are adorable!), stars, or other festive shapes. It’s perfect for Valentine’s Day (pair with these heart-shaped pizzas!), Christmas, or any fun occasion, and still gets crispy and golden.

FAQs
Your crispy vegan fried tofu is best eaten fresh, but you can store leftovers in an airtight container in the fridge for about 3–4 days. To get the crunch back, just reheat in a hot oven or air fryer for a few minutes. It won’t stay quite as crispy as right out of the fryer, but it’s still super tasty!
Not at all! You can bake or air-fry the tofu instead for a lighter, less messy option. It won’t be quite as crunchy, but it’s still golden and delicious. Oven Frying: Preheat your oven to 425°F. Bake the coated tofu for about 25–30 minutes, flipping halfway through. Air Frying: Set it to 400°F and cook for 12–15 minutes, shaking or flipping halfway. You can also keep an eye on it—the tofu should be golden brown and crunchy when done.
Yes! You can make it gluten-free by swapping regular flour with a gluten-free flour blend or chickpea flour. Swap out soy sauce for tamari or coconut aminos. Make sure the vegetable bouillon you use is also gluten-free.
More Delicious Vegan Chicken Recipes


Print me! Did you know you can easily print our recipes? Just tap the “Print Recipe” button in the recipe card. You can keep a stack of new recipes to try in your kitchen—or better yet—create a recipe binder where you keep all your favorites!

Vegan Fried Chicken
Ingredients
Ingredients:
- canola oil, for frying
- 2 blocks super firm tofu, drained (Hodo tofu works best, if you can find it!)
- 2 tablespoons soy sauce, or Tamari
- ½ cup soy milk, unsweetened, plain
- 1 teaspoon bouillon powder
Dredge:
- ½ cup flour
- ½ cup water
Coating:
- ½ cup potato starch (+ 4-5 tablespoons water)
- ½ cup flour
- 1 teaspoon baking powder
- ¼ teaspoon baking soda
- 1 teaspoon garlic powder
- 1 teaspoon minced dried onion
- ½ teaspoon smoked paprika
- ½ teaspoon vegetable bouillon powder
- 1 tablespoon nutritional yeast
- 1 teaspoon salt
- ½ teaspoon pepper
Optional:
- coarse sea salt
Instructions
- Using your hands, tear the tofu blocks into bite-sized chunks. The exact size and shape is up to you! (Or have fun cutting tofu into shapes with cookie cutters!)
- Lay tofu in a flat-bottomed container, and drizzle soy sauce on top. Sprinkle with bouillon powder, and drizzle the soymilk over that. Set aside.
- Prepare the batter: whisk 1 cup flour and 1 cup water together until you reach the consistency of pancake batter.
- Prepare the coating: In another bowl, add potato starch and 4 tablespoons of water and mix with your hands. Rub the water and starch together with your fingers until you have a crumbly texture and some tiny round nuggets form. If needed, add additional water, just a teaspoon at a time. Then, add the flour, baking powder, baking soda, garlic powder, minced dried onion, smoked paprika, vegan bouillon powder, nutritional yeast, salt, and pepper. Mix well.
- Prepare your deep dryer, or fill a pan with one inch of canola oil and heat over medium-high heat for about 5-10 minutes until hot.
- Take a piece of tofu, shake off the liquid marinade, and place it in the batter. Dip both sides to coat, and then dip in the dry crumbly coating. Dip again in the liquid dredge, and again in the crumbly coating.
- Place the double-battered tofu in a deep fryer or on a pan with at least one inch of hot canola oil, and fry for 1-2 minutes on each side until golden brown and crispy. Repeat with remaining tofu.
- Using tongs, remove from oil, place on a wire rack to cool, and sprinkle with coarse sea.
Nutrition
You may also like...


")

Enter to Win Our Monthly Giveaway!
New winner every month! Drop your name below for a chance to win hundreds of dollars of vegan prizes from our brand partners. You’ll also receive our weekly e-newsletter with plant-based recipes galore!
Leave a Comment